
| Orig. Posting Date | User Name | Edit Date |
| Apr 23, 2015 09:46AM | tmsmith | |
| Apr 23, 2015 06:15AM | Richard1 | |
| Mar 3, 2015 08:47AM | MiniMike | |
| Mar 2, 2015 02:55PM | Richard1 | |
| Feb 16, 2015 02:13PM | Richard1 | |
| Feb 6, 2015 12:42PM | 61MiniMe | Edited: Feb 7, 2015 02:55PM |
| Feb 6, 2015 07:32AM | rb92673 | |
| Feb 6, 2015 07:28AM | SirCoop | |
| Feb 6, 2015 03:32AM | Richard1 | |
| Feb 5, 2015 07:16PM | Abelclasico | |
| Feb 5, 2015 06:58PM | Adventure1990 | |
| Feb 5, 2015 06:00PM | malsal | |
| Feb 5, 2015 03:39PM | clubman76 | |
| Feb 5, 2015 03:38PM | SXSMAN | |
| Feb 5, 2015 03:04PM | Richard1 | |
| Jan 31, 2015 03:54PM | Richard1 | |
| Dec 13, 2014 05:59AM | Richard1 | Edited: Dec 13, 2014 06:01AM |
| Nov 24, 2014 03:23AM | Richard1 | |
| Nov 23, 2014 09:34PM | fishingka | Edited: Nov 24, 2014 07:48AM |
| Nov 23, 2014 08:08PM | malsal |

|
Total posts: 3749
Last post: Mar 26, 2024 Member since:Jun 23, 2000
|
Cars in Garage: 1
Photos: 201 WorkBench Posts: 0 |
|
Fantastic news!
|
|
Total posts: 606
Last post: Feb 2, 2024 Member since:Mar 11, 2010
|
Cars in Garage: 0
Photos: 6 WorkBench Posts: 1 |
|
It turned out I needed more than just the relay module, as when it came we still went crazy trying to get it to run. After searching for more wiring diagrams, I had to leave for the states for 3 weeks and put a friend who understands the electronics and wiring on it to help out.
Yesterday I got back and have fantastic news from my electronics friend. The engine is running!!! I asked for a video.
Turns out our problem was not in the wiring variations, but a burned out diode in the computer. He replaced the diode and connected things. Now I've got to slip away to Tarija and get it on the road for its first drive.

|
|
Total posts: 2057
Last post: Feb 5, 2024 Member since:Sep 24, 1999
|
Cars in Garage: 1
Photos: 231 WorkBench Posts: 11 |
|
|
|
Total posts: 606
Last post: Feb 2, 2024 Member since:Mar 11, 2010
|
Cars in Garage: 0
Photos: 6 WorkBench Posts: 1 |
|
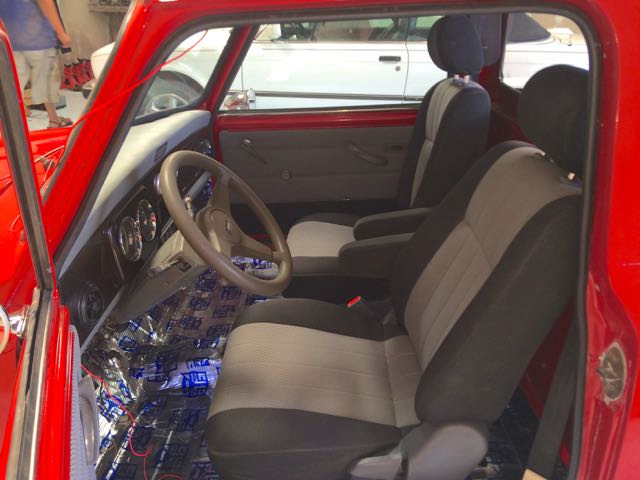
I finally have it running (while driping gas into the SPI). My wife is bringing home a jug of gas for tomorrow.
I had to move the handbrake that my body guy installed. When I put the cables in they were too short, so I moved the base back about 2 1/2 inches.
Then I finished my exhaust system. I used the SPI front section and joined a Corolla exhaust pipe with muffler to it. At the joint I dropped a metal hanger made out of a piece of scrap steel with an L facing upwards to a bolt through the floor (the bolt is long enough to use two nuts for adjustment). The long end of the "L" fits one of the bolts on the connection from the front to the Toyota (actually flipped the toyota one around so the muffler is at the front, and cut off the curved connector that was at the other end). Then I cut hooks for the rubber mounts off the tail end, cut it in half, and welded half to the front of the rear frame above the handbrake guides, and the other half to the side of the pipe at that point. The rubber circle support pulls the tail pipe tight against the rear corner of the frame, so I made a rubber cushion for it (like the one on the windshield wiper motor, but from a heavy foam) and glued it to the frame.
Then for fun I added a chrome curve extension to it, after cutting the end so the angle would match. (not sure yet if I like the extension).
|
|
Total posts: 606
Last post: Feb 2, 2024 Member since:Mar 11, 2010
|
Cars in Garage: 0
Photos: 6 WorkBench Posts: 1 |
|
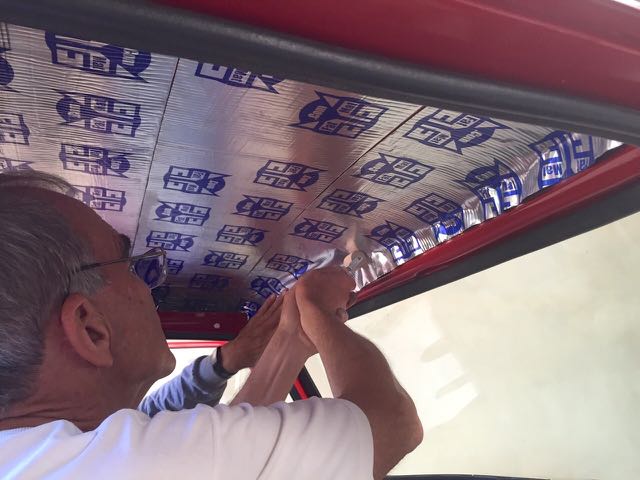
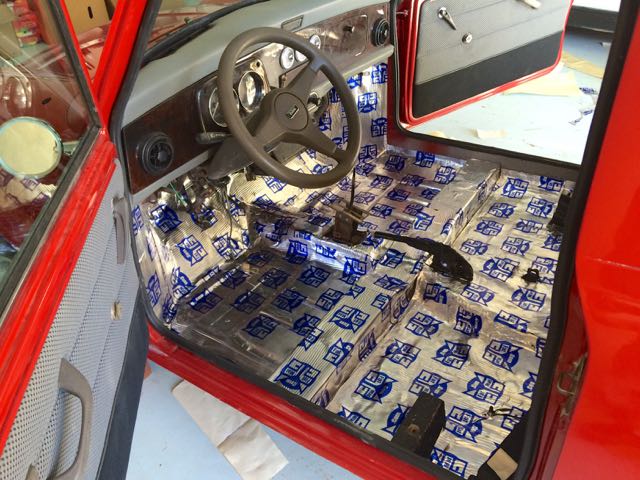
I had to leave it and come back to work, but before I left I put the Fatmat on the roof and floor, and finished all the rear wiring.
 |
 |
|
|
Total posts: 327
Last post: Jan 20, 2017 Member since:Feb 14, 2010
|
Cars in Garage: 0
Photos: 0 WorkBench Posts: 0 |
|
Stunning! I'd be willing to wager you have one of the nicest truck restorations anywhere for the least amount of $$$ invested!
I hate to see it almost finished as I've loved following your posts. Amazing what a little skill (ok alot), talent and years of know how can accomplish.
Well done!
|
|
Total posts: 157
Last post: Jul 24, 2020 Member since:Aug 28, 2013
|
Cars in Garage: 0
Photos: 0 WorkBench Posts: 0 |
Looks really nice!
|
|
Total posts: 217
Last post: Jul 20, 2022 Member since:Apr 16, 2012
|
Cars in Garage: 0
Photos: 0 WorkBench Posts: 0 |
|
WOW! Awesome ! Richard that is amazing! Make sure you give the bodyshop a case of their favorite brew!
SirCoop
|
|
Total posts: 606
Last post: Feb 2, 2024 Member since:Mar 11, 2010
|
Cars in Garage: 0
Photos: 6 WorkBench Posts: 1 |
|
I think I have what I need on order for the electrical problem, mainly the relay module for the computer. To that order I added the brake cables and speedometer cable that I was missing. Waiting to see of DHL beats the $210 FedEx quote from the UK.
Today I'll make the fuel lines and start on the interior (Fatmat on floor and roof).
|
|
Total posts: 946
Last post: Dec 26, 2023 Member since:Aug 6, 2011
|
Cars in Garage: 0
Photos: 0 WorkBench Posts: 0 |
|
that is a truly amazing accomplishment, especially taking into account the scarcity of Mini parts where you live. I really liked how you overcame this, congratulations,
cheers,
Abel
|
|
Total posts: 41
Last post: May 6, 2016 Member since:Jan 17, 2015
|
Cars in Garage: 0
Photos: 0 WorkBench Posts: 0 |
looks amazing! I can't wait to start my own, day after tomorrow it starts!
"If you think adventure is dangerous, try routine; it is lethal." - Paulo Coelho
|
|
Total posts: 8382
Last post: Jan 13, 2022 Member since:Feb 7, 2006
|
Cars in Garage: 0
Photos: 0 WorkBench Posts: 0 |
|
Nice work Richard. Truly amazing how it looks now compared to what you started with and with super straight bodywork as well. Have you solved all the electrical running issues yet ?
If in doubt, flat out. Colin Mc Rae MBE 1968-2007.
Give a car more power and it goes faster on the straights,
make a car lighter and it's faster everywhere. Colin Chapman.
|
|
Total posts: 217
Last post: Jul 10, 2016 Member since:Feb 12, 2013
|
Cars in Garage: 0
Photos: 0 WorkBench Posts: 0 |
Its beautiful, great job Richard1!!! I also followed your Corvair Restoration, a lot of great information.
Spokane, WA
1962 Austin Mini 850 Countryman Woody Wagon
|
|
Total posts: 1125
Last post: Nov 6, 2019 Member since:Jan 27, 2014
|
Cars in Garage: 0
Photos: 0 WorkBench Posts: 0 |
WOW !
Looking great. I've enjoyed updates and pictures of the build and watching your problem solving.
Must say I almost don't want it to end. Almost.
Thanks for sharing.
|
|
Total posts: 606
Last post: Feb 2, 2024 Member since:Mar 11, 2010
|
Cars in Garage: 0
Photos: 6 WorkBench Posts: 1 |
|
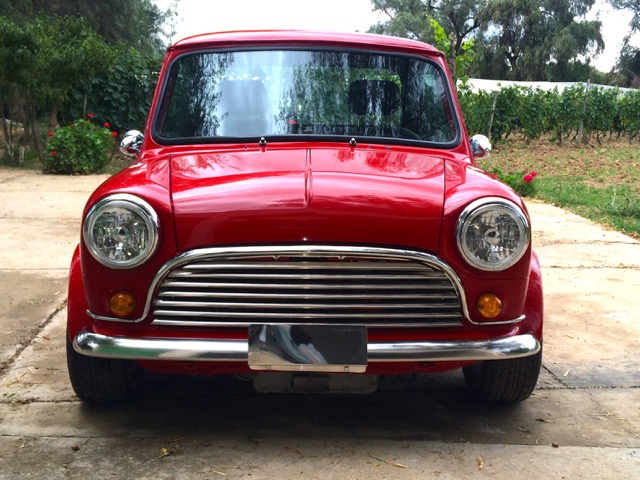
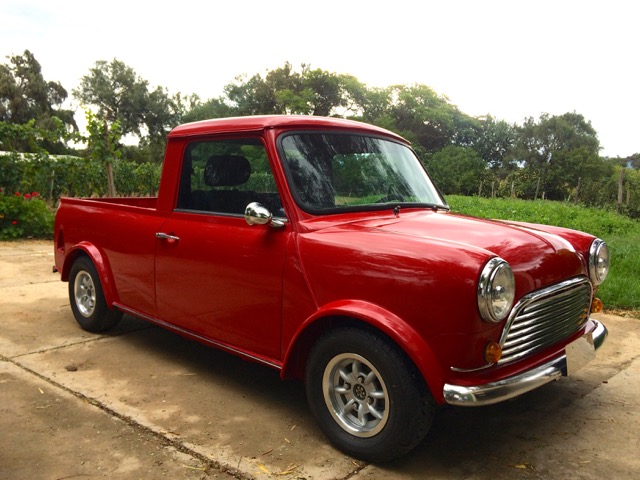
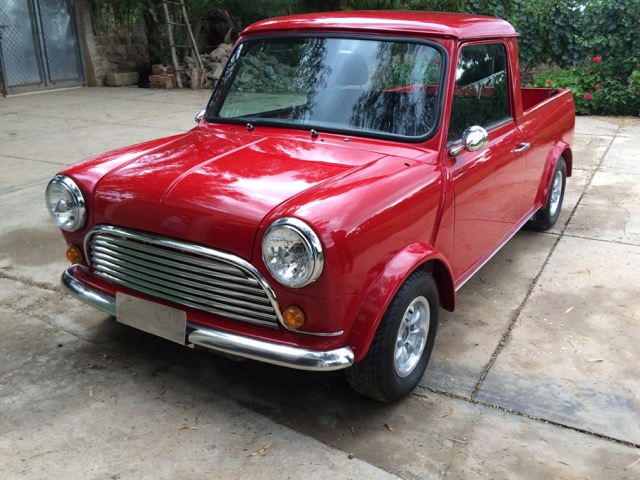
This afternoon I brought it home and washed and polished with Meguiars
 |
 |
 |
 |
 |
|
|
Total posts: 606
Last post: Feb 2, 2024 Member since:Mar 11, 2010
|
Cars in Garage: 0
Photos: 6 WorkBench Posts: 1 |
|
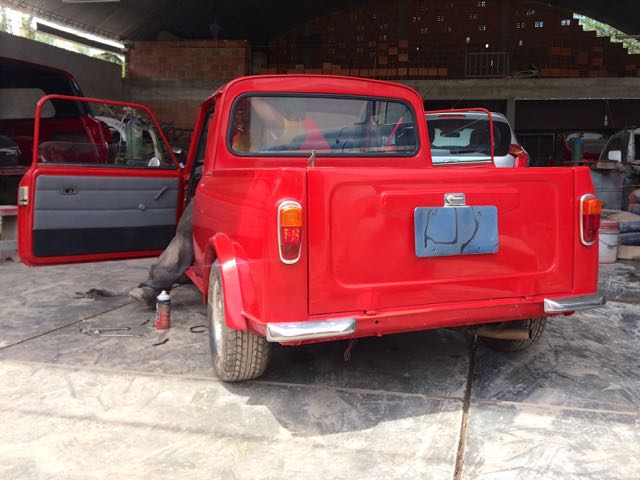
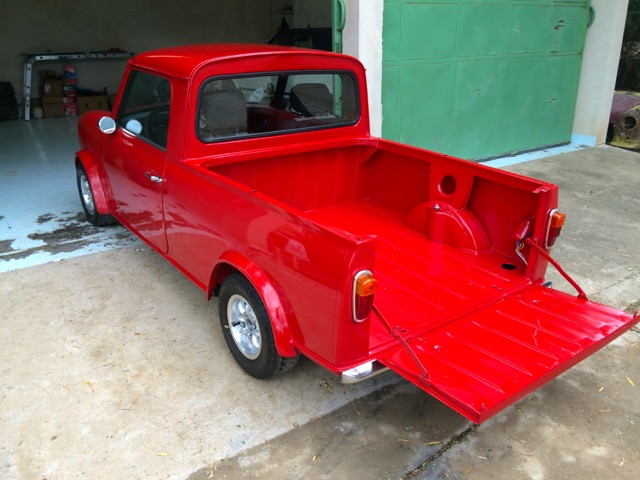
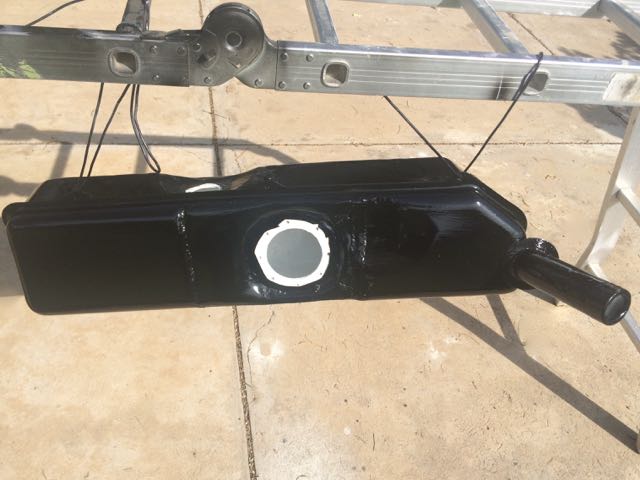
Most have probably seen my numerous questions these couple of weeks, and things progress, although now I'm waiting on parts. But I finished the gas tank and told my body guy he has til Monday to finish so I can bring it home to rest in my garage until the parts come
 |
 |
 |
|
|
Total posts: 606
Last post: Feb 2, 2024 Member since:Mar 11, 2010
|
Cars in Garage: 0
Photos: 6 WorkBench Posts: 1 |
|
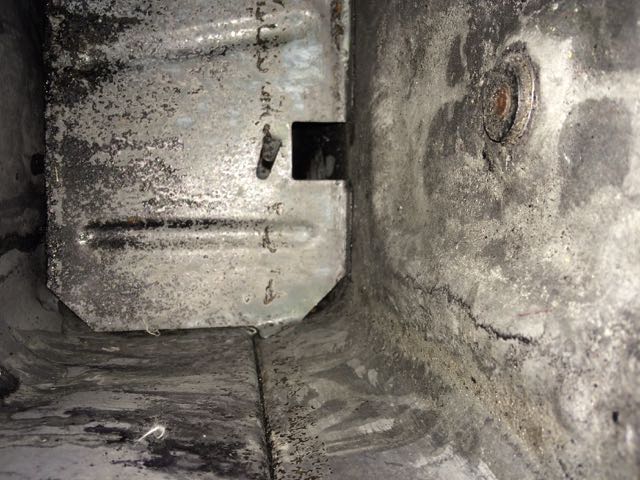
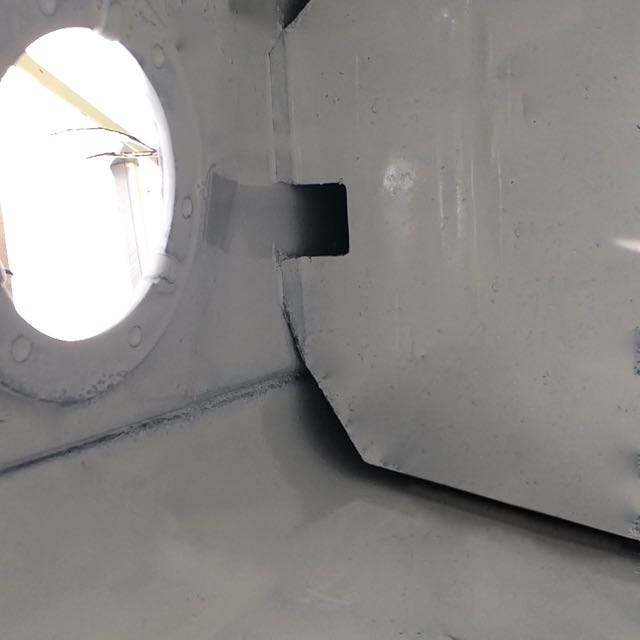
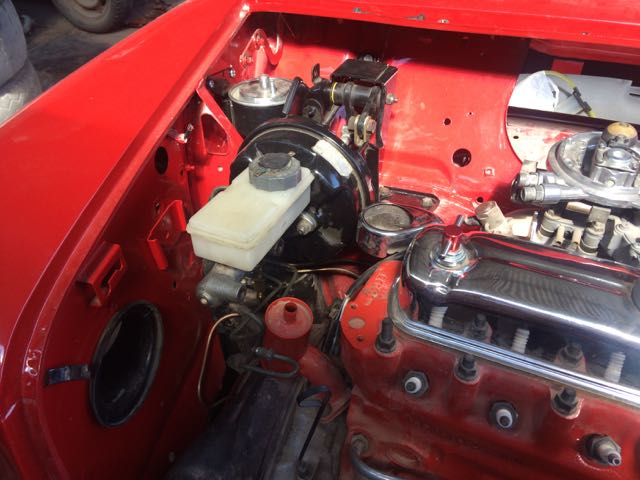
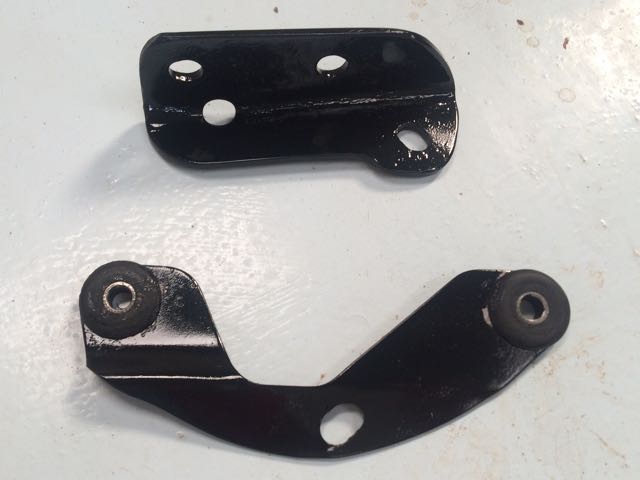
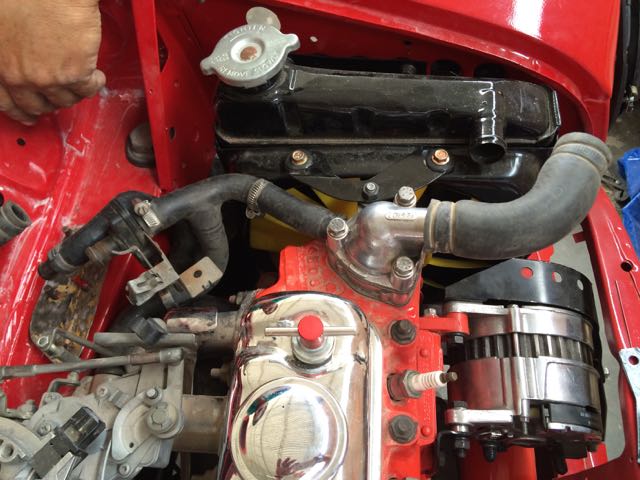
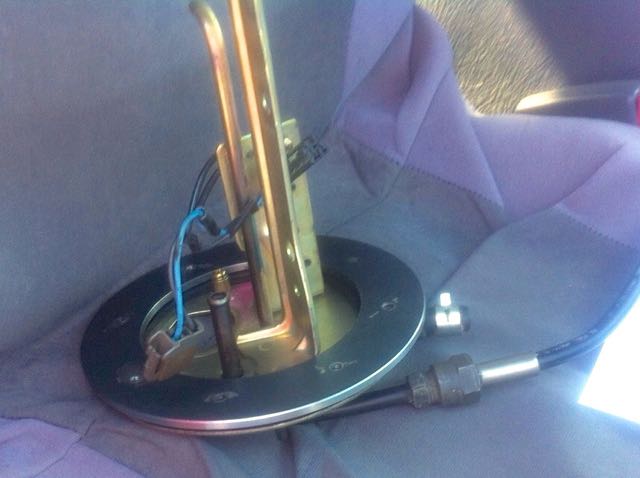
A little more of what I got done on the trip, thanks to help in fitting various parts together. BTW, I've now determined that the front clip is late 90 or early 91 (oct 90 windshield wiper motor), with the engine being a late 92 SPI. I haven't figured out what year the doors are. This all attached to the 75 rear half. Brake booster and valves are metric, while the rest of the brake system is in inches.
Booster installed with crossover
 |
Radiator and alternator brackets fabricated and installed
 |
 |
Fuel tank adapter plate fabricated for in-tank pump
 |
|
|
Total posts: 606
Last post: Feb 2, 2024 Member since:Mar 11, 2010
|
Cars in Garage: 0
Photos: 6 WorkBench Posts: 1 |
|
"A lot cheaper than buying the correct used one (if you can find it for sale anywhere)."
Total cost was just under $19 US.
|
|
Total posts: 1953
Last post: May 6, 2016 Member since:Aug 8, 2004
|
Cars in Garage: 0
Photos: 0 WorkBench Posts: 0 |
|
Congrats on the great progress so far. You must be excited, it's starting to look closer to done. It's been fun watching your progress.
Kristina
![]() Nothing great was ever achieved without enthusiasm!
Nothing great was ever achieved without enthusiasm!
|
|
Total posts: 8382
Last post: Jan 13, 2022 Member since:Feb 7, 2006
|
Cars in Garage: 0
Photos: 0 WorkBench Posts: 0 |
|
I grabbed a couple of days to get a little done. Paint is still not sanded and polished, but that means I don't have to be as careful, or if Murphy interferes, it is not as bad. Been working on the brakes, installing the radiator (details of problems in other post), shocks, and drive shafts.
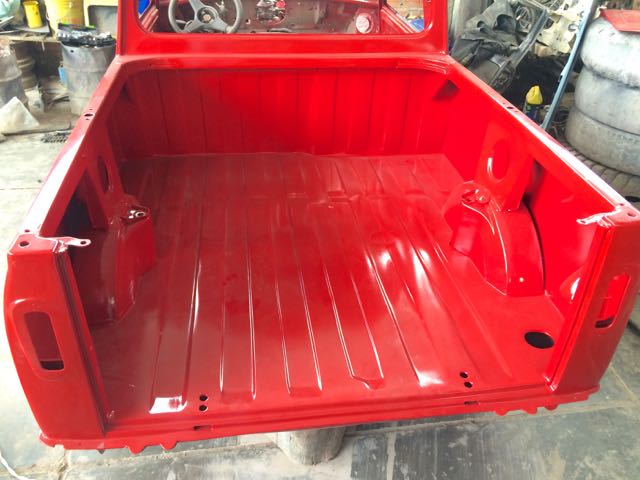
Body guy finally painted the bed. Notice that we filled all the cracks and crevices with Great Stuff foam to seal them.
Here is my adaptation for the brakes. Since the master cylinder and booster are on the right, and I will drive on the left, I made this little contraption from my two pedal supports. Not very pretty in the picture. Parts are in the kitchen oven at the moment after painting.
 |
 |
A lot cheaper than buying the correct used one (if you can find it for sale anywhere). Or you could just go with the non servo brake master cylinder or use a remote servo and fit it all on the left.
If in doubt, flat out. Colin Mc Rae MBE 1968-2007.
Give a car more power and it goes faster on the straights,
make a car lighter and it's faster everywhere. Colin Chapman.


